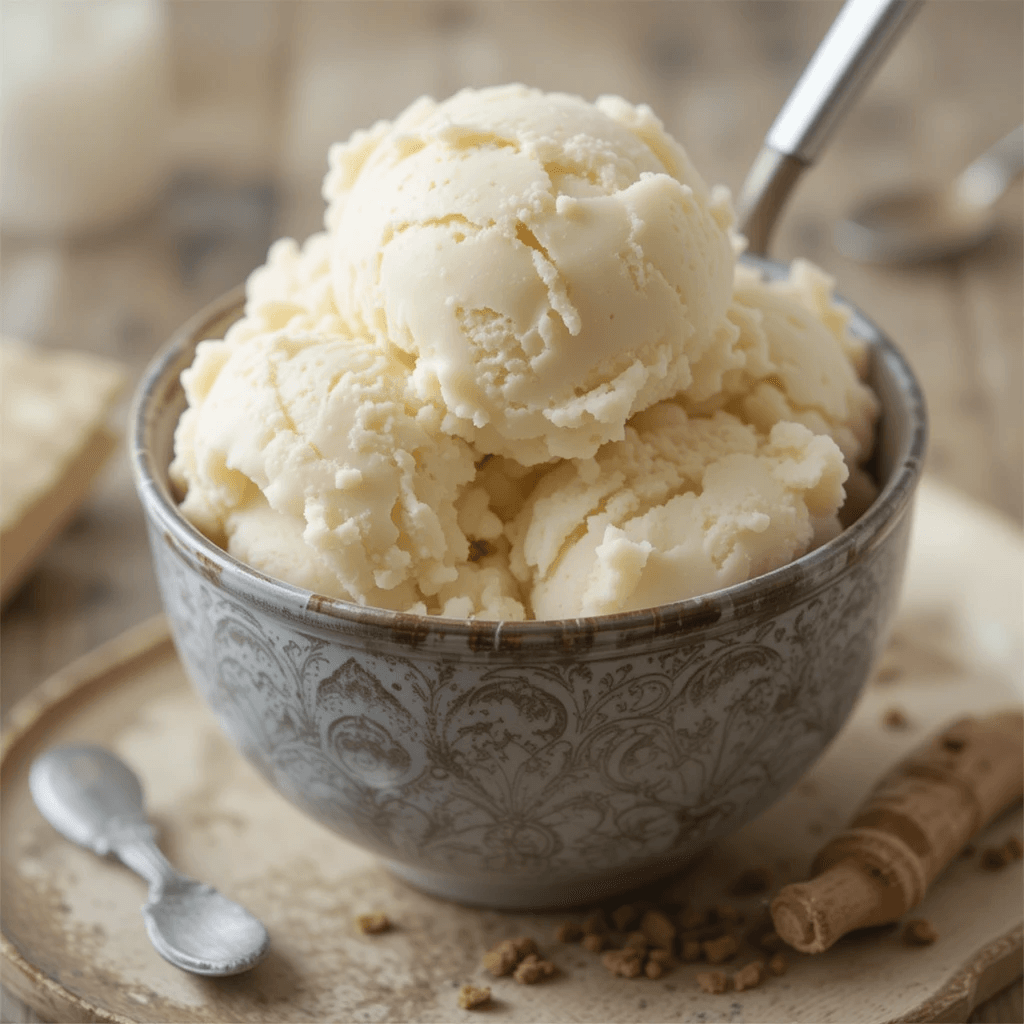
There’s nothing quite like the smooth, creamy indulgence of homemade vanilla ice cream—simple, rich, and bursting with the unmistakable warmth of real vanilla. Unlike store-bought varieties, this recipe delivers a pure, custard-based ice cream that’s both deeply flavorful and luxuriously silky in texture. Whether you’re serving it solo in a bowl, sandwiching it between cookies, or topping a fresh pie, this ice cream is a timeless treat that elevates every dessert moment.
Why Homemade Vanilla Ice Cream is the Gold Standard
Vanilla ice cream might sound basic—but when it’s homemade, it’s anything but. The flavor of real vanilla bean or pure extract, combined with fresh cream and egg yolks, creates an irresistibly smooth, dense, and luscious result. Plus, making it yourself gives you control over ingredients, sweetness, and consistency—no artificial thickeners or preservatives here.
Ingredients for Classic Homemade Vanilla Ice Cream
To make the creamiest and most flavorful vanilla ice cream, you’ll need high-quality, full-fat ingredients and patience during the chilling process.
Ingredients:
- 2 cups heavy cream
- 1 cup whole milk
- 3/4 cup granulated sugar
- 5 large egg yolks
- 1 tbsp pure vanilla extract (or 1 whole vanilla bean, split and scraped)
- Pinch of salt
Step-by-Step Instructions to Make Homemade Vanilla Ice Cream
1. Heat the Cream Base
- In a medium saucepan, combine the milk, heavy cream, and half of the sugar.
- If using a vanilla bean, add it now along with its scraped seeds.
- Heat the mixture over medium heat until it begins to steam, just before boiling.
2. Temper the Egg Yolks
- In a separate bowl, whisk the egg yolks with the remaining sugar until light and pale.
- Slowly drizzle about 1/2 cup of the hot cream mixture into the yolks, whisking constantly to temper them.
- Gradually pour the yolk mixture back into the saucepan while stirring.
3. Cook the Custard
- Return the saucepan to medium-low heat.
- Stir continuously with a wooden spoon or spatula, scraping the bottom to prevent scorching.
- Cook until the custard thickens slightly and coats the back of the spoon (about 170–175°F or 77–80°C).
- Do not let it boil.
4. Strain and Chill
- Remove from heat and pour the custard through a fine mesh sieve into a clean bowl to remove any curdled bits.
- Stir in the vanilla extract if you didn’t use a vanilla bean.
- Cover and chill the custard in the refrigerator for at least 4 hours, preferably overnight.
5. Churn to Creamy Perfection
- Pour the chilled custard into your ice cream maker and churn according to the manufacturer’s instructions (typically 20–30 minutes).
- The ice cream should be thick and creamy, similar to soft-serve consistency.
6. Freeze Until Firm
- Transfer the churned ice cream into an airtight container.
- Press a layer of parchment paper or plastic wrap on top to prevent ice crystals.
- Freeze for at least 4 hours, or until firm enough to scoop.
Pro Tips for the Creamiest Vanilla Ice Cream
- Use full-fat dairy: Skimping on fat leads to icy texture. Stick with heavy cream and whole milk.
- Don’t rush chilling: The longer the custard chills before churning, the smoother your ice cream.
- Churn in a cold bowl: Freeze the ice cream bowl for at least 24 hours if using a freezer bowl model.
- Add mix-ins at the end: If you’re adding cookie crumbles, fruit, or nuts, mix them in during the final minute of churning.
Vanilla Ice Cream Variations to Try
French Vanilla
Use only egg yolks and add a splash of brandy or rum for a richer, deeper flavor.
Vanilla Bean Flecked
Scrape out an entire vanilla bean and steep it in the cream mixture for intense, aromatic flavor and signature specks.
Honey Vanilla
Substitute half the sugar with local honey for a floral twist.
Dairy-Free Vanilla Ice Cream
Use full-fat coconut milk and cornstarch instead of eggs for a plant-based option.
Delicious Pairings and Serving Ideas
Homemade vanilla ice cream shines on its own, but it’s also the perfect partner to other desserts:
- Warm apple pie or cobbler
- Molten chocolate cake or brownies
- Espresso affogato
- Peach galette or berry crisp
- Fresh fruit and waffle cones
Storage Tips for Homemade Ice Cream
- Keep tightly sealed: Use an airtight container to avoid freezer burn.
- Use within 2 weeks: For optimal flavor and texture.
- Soften before scooping: Let the ice cream sit at room temp for 5–10 minutes before serving.
Why This Vanilla Ice Cream Recipe Stands Out
This homemade vanilla ice cream recipe delivers on all fronts—luxurious texture, pure vanilla flavor, and creamy richness that rivals premium brands. It’s versatile enough to be a base for countless flavors or to shine as the star of your dessert table. Once you make this from scratch, you’ll never go back to store-bought.